
 I've reassembled the body panels so as to better fair out the pending fillers in the surface dents/holes. I hope to get to that this weekend.


Priming was my first use of a HVLP sprayer and 2-part (3 actually) primer from House of Kolor. It was important to wear a special paint respirator due to the high VOC that makes the epoxy primer work. The respirator has to be replaced after 40 hours of exposure to the atmosphere, so it gets rebagged right after spraying. And never, ever spray in the garage near the furnace/water heater unless you want to experience the highly explosive nature of VOCs. I took advantage of rare early spring sunny days in Oregon to paint outside (in the front yard no less). Fortunately, the breeze gods were with me as my neighbor did not complain of grey specs on his black truck afterward.
Since the car was media blasted a few weeks ago, I had to do a good scrubbing with a box worth of Scotch Brite pads and "wash" every inch, panel by panel with Metal Ready metal prep. Then quickly neutralize with water, and dry it as fast as possible. It's basically Phosphoric acid that reacts with the steel/rust leaving behind a nice Zinc coating that prohibits rust on bare panels. My shoulders are getting a good work-out, which will help during the long races later.

Then, before painting, every spot must we wiped down with a clean rag soaked in special solvent to remove any fingerprint oils (and everything else).

Then comes the mixing of the spendy primer. Its a 4:1:1 system, so I mix 4 parts primer base with 1 part reducer and 1 part catalyst. Then into the sprayer and move quickly to set the gun adjustments to spray well. It's a balance or air-pressure, air volume, paint volume, and paint pattern. Get all this right and it looks fantastic. Get it wrong...well, call Sunkist cause you've got a big orange peel mess.

The new shoes showed up. there has been great debate on the forums about PanaSports vs. Superlights. I now have both, lucky me !!!! Panas have Advan 032 race tires and the Supers have Hankook Ventus race tires. This could be fun later.
 Panasports
Superlights fitted in place.
Ah, but first I had to do the typical Datsun hub modification to remove the extra lip left on the hub turning. A tad bit-o-grindage and all is fitting nicely (lug-centric fit). No loss in strength. Nitrile gloves did well in protecting the bearings from swarf. Datsun has a huge front hub diameter.
 Drive out the lugs to get access.
  Arrows show lip to remove
Lip gone and rims could then be fit.
So, next steps are:
1.Bondo
2. Sand
3. Sand
4. Sand
5. Weld in remaining roll cage bars for door/dash
6. Clean and Prep
7. Primer/Filler coats
8. Sand
9. Clean and Prep
10. Paint- layers 1, 2 , and 3.
11. Wet Sand
12. Clearcoat- layers 1, 2, and 3.
13. Re-assemble panels
14. Wet sand
15. Pollish paint
16. Weld up custom exhaust
17. Rewire electronics
18. Install everything
19. Fit seats
20. Shoot self for not kistening to wife
21. Doesn't matter from here on out....
And I want to race when????


 But, it fits.
 Here are the panels...YARD SALE ! Doors look like they will need the most body work.
 Hood isn't too bad. Just need to fill the DATSUN logo holes.
 My guess is this driver's front quarter got hit and somewhat rebuilt.
 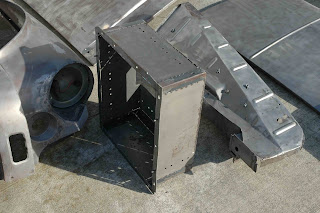 Fuel cell box is the nicest thing on this car now.
 Inside now, warm and dry...well, as dry as can be in Oregon.


